

A few hours of listening to Arnaldur Indriðasson's (fabulous Icelandic crime writer!) novels about Erlendur and the police in Reykjavik on my MP3 player, and a few sore fingertips later I finally have finished my Lucinda's Gift. I'm so happy with how it turned out! I was a bit worried when I pieced it that the contrast wouldn't be good enough since I have used fabrics that could be "medium" both in the dark sections and the lights. But the reds really separates the two sections, and I love the textured appearance from all the scraps.
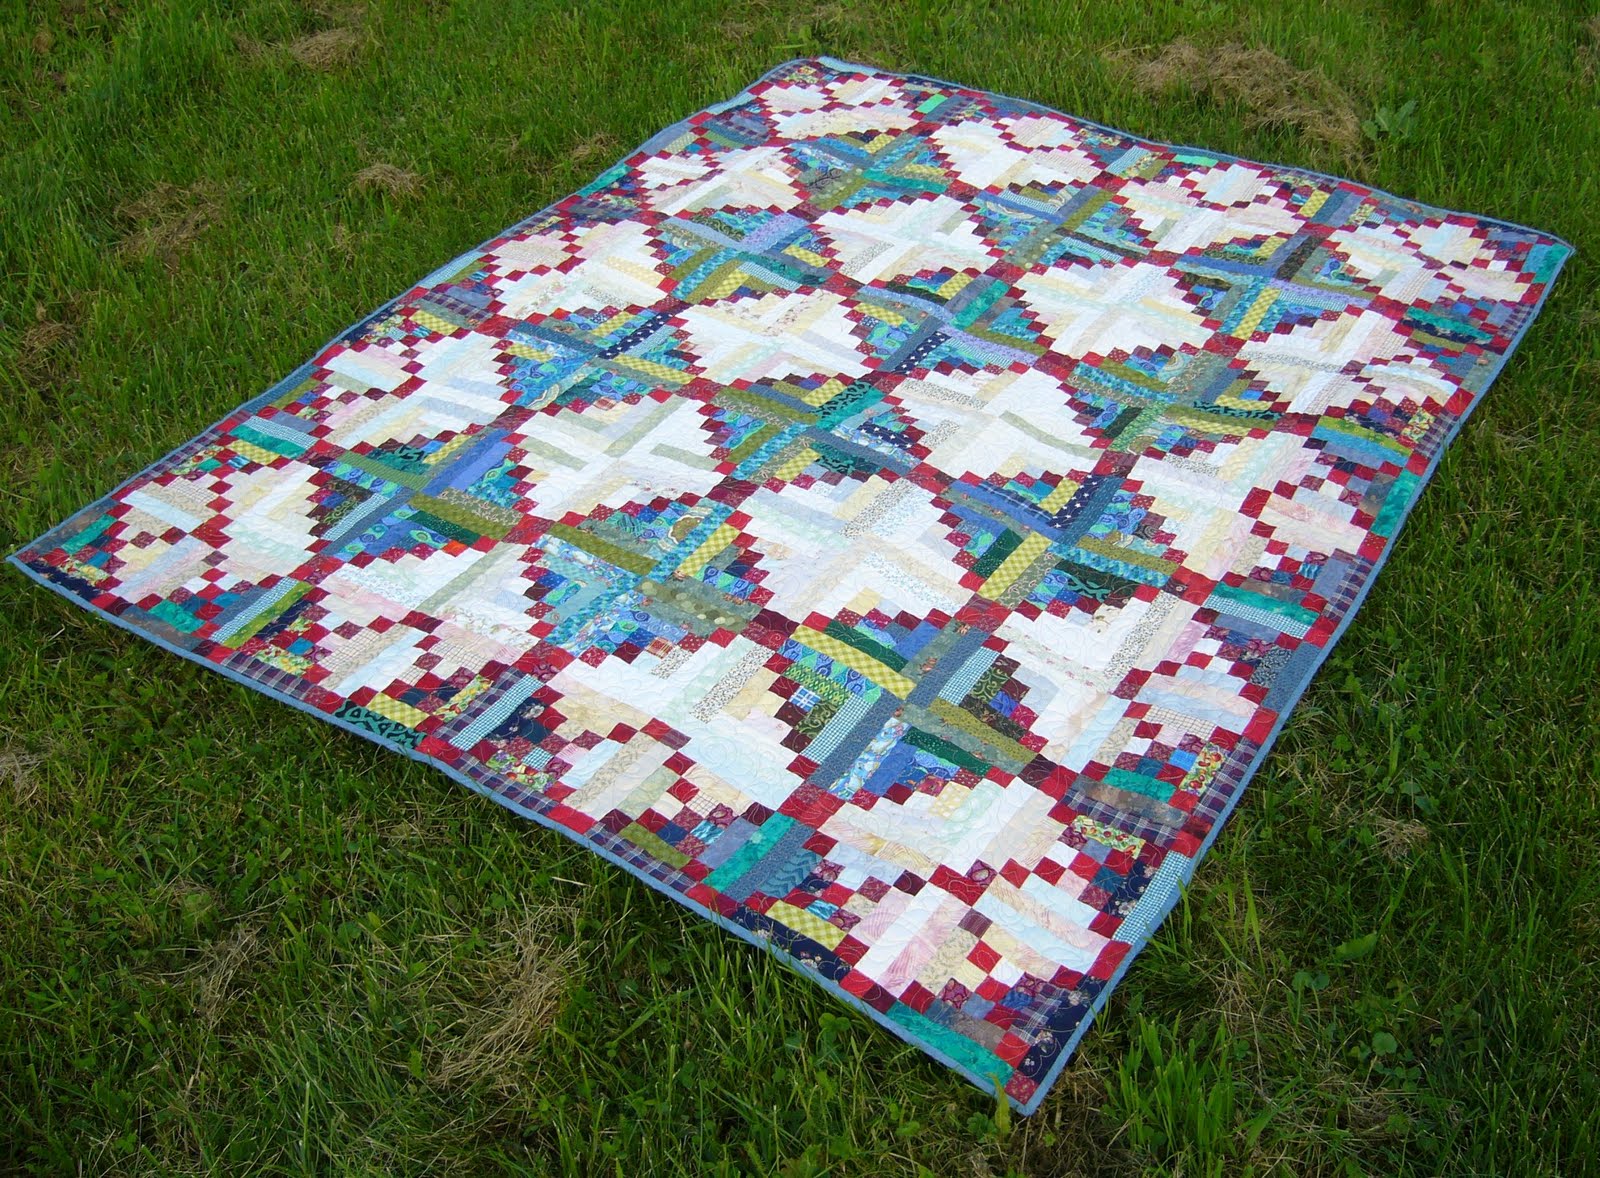
Even the binding turned out better than I had thought - when I was stitching it down it looked a bit lighter than I would have liked, but once it was all done, that narrow strip really look good - if I do say so myself ;-) And I managed to use up some scraps on the back too - a bit weird, but I can live with it *lol*

Elin made a request at my previous post for a tutorial on free motion quilting. I don't really have an idea for how to build up a great tutorial at the moment, but I know there are some really good ones out there to watch.- have a look at the links at the bottom of this post :-) But anyways, I thought I'd make a list of things that work for me when doing free motion quilting on a domestic sewing machine.
Sewing machine
Get familiar with your machine! Play with it - it is your friend, and you are supposed to have fun together! Make some samples and try out different settings. Some machines will let you quilt very well with your feed dogs in a raised position, on others you have to lower them or cover them. Also get to know your darning foot - what will it let you do, and what won't it. Also use a fresh needle for quilting!
Batting
Don't use a heavy batting or batting with high loft. Remember you have to squeeze some of the bulk through the short arm of the machine, so don't chose something that will cause you stress. If you want a heavy or thick winter quilt I suggest you either split the quilt in sections and quilt it according to the "quilt-as-you-go" method, hand quilt it or take it to a long arm quilter.
Basting
This is another one of those "try and see what works for you" ;-) Usually I pin baste my quilts - even if it does take some time and can be tough on the fingers, it is the easiest for me, and the safety pins are quick and easy to remove as I get to them while quilting.
If I'm in a hurry or if I' certain I'm going to wash the quilt once it is done I glue baste. I used glue for Lucinda's Gift and it held up beautifully. But it is a messy process so I try to avoid it, though.
But for quilts I know will take me time to complete I baste with a smooth and highly visible thread to put as little strain as possible on the fabric.
Thread
Chose a thread that is soft at pliable. A heavy weight cotton that has not been waxed is usually nice to quilt with. And I actually love to quilt with machine embroidery thread, it does give a different feel and look to a quilt, especially after it has been washed, but it is worth a try.
Test the thread tension on your sewing machine with different threads - you will have to adjust it depending on type and thickness, and not all threads will work well with your machine.
Use the same quality thread in the top and the bobbin. I know some recommend you use the same colour/shade at top/bottom as well, but if your thread tension is right you can quilt with different colours without it being a problem.
Gloves
You will need something on your hands to give you a better grip on the quilt sandwich. Personally I loooove LicketyGrip - a gel you rub onto your hands. The little box is fairly expensive, but it lasts a really long time and is good value for your money.
If you don't want to use chemicals you can try quilting gloves bought at the quilt shop, they work very well and last a long time - it took me a couple of years to wear out a pair ;-)
Gardening gloves - they work a treat and are heaps cheaper, but they tend to be very warm, and make sure to get some with colourless rubber tips or you will find spots on your quilt!
Moving gloves - you know the cotton knit ones with rubber dots? - work like a charm! I have talked to women who quilt with washing up gloves and apparently they work well.
And you know those rubber finger tips you get at the stationary section at the book shop? Also great, especially if you don't like wearing gloves/mittens.
The quilting
Relax and have fun! You put a lot of strain on your arms and shoulders, so use any means to relax you - an audio book or some relaxing music, a cup of tea or perhaps a glass of wine, etc. Don't quilt for too long at a time! No more than half an hour at the machine without a break.
If you look at old quilting books they recommend you roll up your quilt into a tight package with a small square open for quilting. I don't like that! I like to have the quilt in soft folds around the sewing machine so I can see where I've been and where I'm going. It also makes it easier for me to turn the quilt at an angle and to "mush" the it under the arm of the machine.
Plan out your quilting. Divide the quilt into quarters so that you never have more than half the sandwich under the arm of the machine, and start at the center and work your way out. Here's an example of what usually works for me:

Don't try to cover a large space in one go - just concentrate on what is on the board of your sewing machine and you can see between your hands when you hold the quilt. One section at a time and you will eventually have quilted the whole quilt.
Make up loads of samples, turn them into cushions and fill your sofa ;-) Remember practice makes perfect - and don't expect perfection. The most important is to have fun and produce something you are happy with!
My favorite tutorials for free motion quilting
The videos I have learned the most from are Patsy Thompson's - have a look at the videos on her website: http://www.patsythompsondesigns.com/free-video/ I absolutely love these, she really explain things so well!
If you don't want to sit down and watch a video, there's a nice picture tutorial on Vicki's blog on the basics: http://www.sewinspiredblog.com/2007/09/free-motion-machine-quilting-tutorial.html
Free motion quilting is very much about imagination and sometimes you get stuck thinking up a pattern - Leah Day have some great patterns to try, there are loads of videos on her blog: http://freemotionquilting.blogspot.com/
Hope everyone are enjoying the weekend
Hugs and stitches from Anne Ida


